
Assuming you haven't decided to either drop out or hex me due to all that cutting, and in good news I haven't to my knowledge been burned by any laser beams shooting from your eyeballs directed at me nor have I woken up screaming in the night because my cutting hand felt like it was being severed, we are on to the fun part - getting Vinnie and Maude to make blocks together. It's a little risque, but we're going to do it anyway.
 The first and loudest
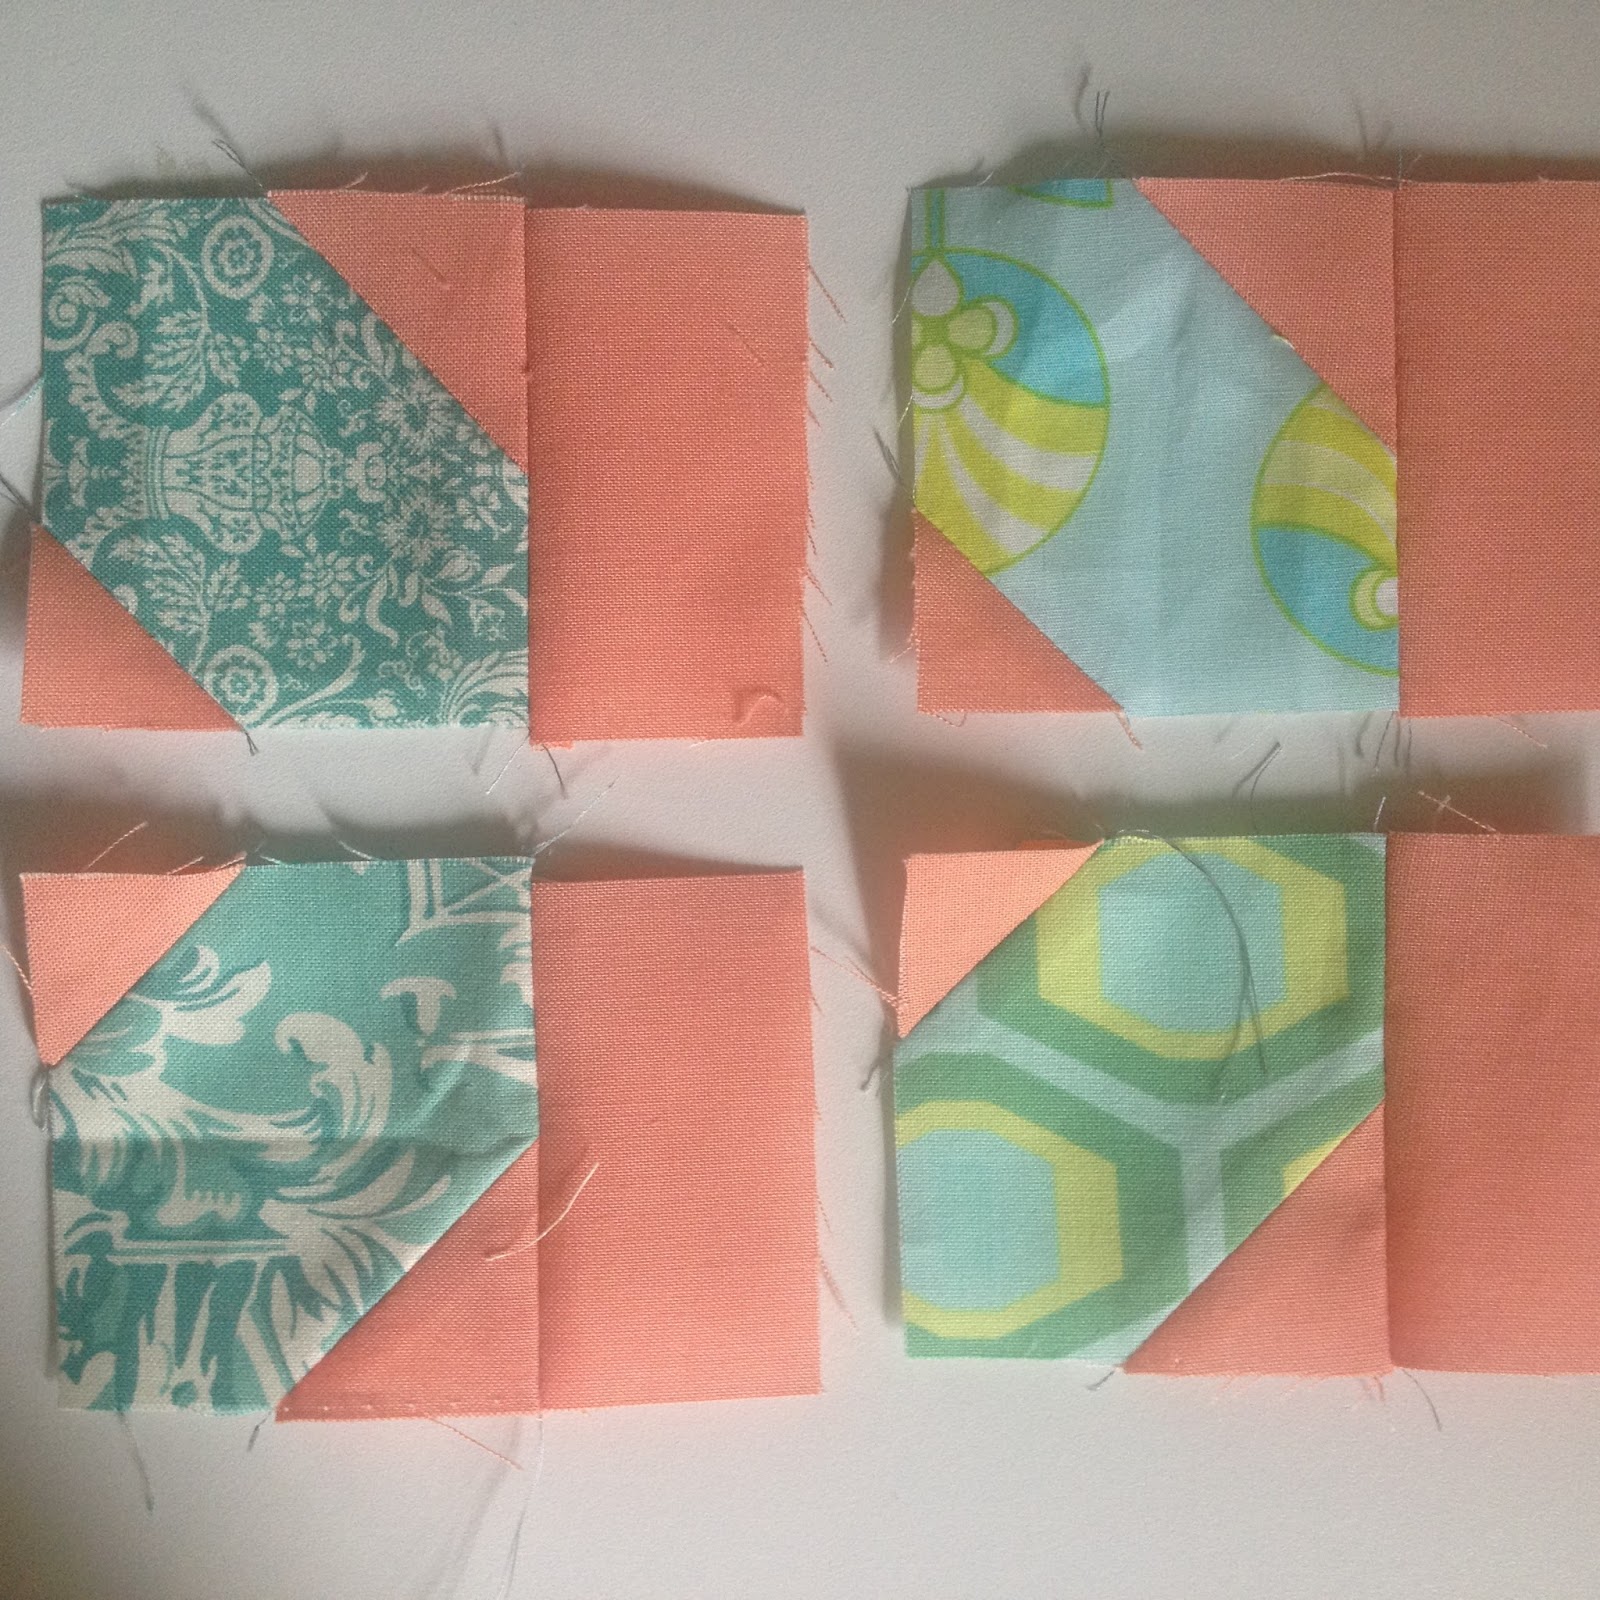
 If testers had had their way, I'd have rewritten the pattern to get rid of those squares. But sometimes it's amazing to be the boss, and be able to say no. As tiny as those squares are, to me they make a difference in the look of the block, and I like it a lot better WITH them than without them.
Witness the subtle, but still there, difference in the photo below. The right side block is made as the pattern calls for, using the smaller squares. On the left, the block is made with only the larger squares. While I am only one opinion, I personally like the block on the right better. More of the print is showing, so it is more ABOUT the prints than making the background equal. And the center "star" type thing is way more pronounced and exact when the block is made as printed, rather than being somewhat cut off at the corners. But that's me. If you really really hate the little squares, try it without. Maybe you'll be okay with it.

 I will say this - once I told testers I was not budging, most agreed I was right to leave them in for interest of the block. I place the Vinnie Loves Maude block in the category of "Not Difficult, but Takes Some Time." Not all quilts can be whipped out in an afternoon. And much like the adage, of which I am a huge fan and believer, of "You Get What You Pay For," you also get in design interest of a finished quilt what you are willing to put into it. There's a time and place for quick quilts; I love that time and place and have made and designed lots of them and will continue to do so. There's also a time and place for quilts that might take a little longer; if we are honest, those are the quilts we are drawn to more frequently in show and tell and quilt shows and online. I want to design a few of those too, and this just happens to be one of them! (Insert "So there.")
So how do we mentally deal? We buckle down, we put on the fun music or a good audio book, and we chain piece our little heads off and get those suckers on there!
 With small pieces, especially sewn at a diagonal, seems to come the risk of some machine entanglement, and let's be honest, "entanglement" may be kind of fun to say, but it is no fun to deal with. No one wants to be pulling fabric out of the bobbin case on a regular basis. One thing I have found to help when chain piecing these bits is to lift the presser foot between each piece in the chain and manually insert the needle into the next set to be sewn, as shown at left. The needle can be inserted right at the tip of the piece, but because it is indeed actually INSERTED rather than sewn onto at a rapid pace as chain piecing goes, the risk of pieces becoming messed up at the corner and/or all balled up in the machine is cut down significantly. Does lifting the presser foot and putting down the needle between each segment take a little more time? Sure. Would having to stop chain piecing to rip a seam that got entangled and messed up every three segments take longer? Trust me, it would, it does, and it has for me.
 You may not find that chain piecing these small pieces is any problem at all for your machine to handle, and if so I say bully for you. I personally find the smallest squares can ball up, but the other squares, which are only a teeny bit bigger, never do. It's a mystery of the universe. And for those of you making the larger size block? You'll probably have no idea what I'm talking about, because yours will go together smooth as anything, being that much bigger.
Now, you may have noticed in these photos that I have not done the expected thing when sewing corner to corner - crazy as I am, I have NOT drawn a line on the background pieces. I haven't even made mention of doing so anywhere in the pattern. Is this because I am a rebel? Is this because I am lazy? Is this because I have discovered the best tool in the world that eliminates the need entirely? YES TO ALL, HOTTIES!

As shown in the photo at right, just keep the tip of your background piece in line with the middle of the black and green lines on the CPA, and you will make a perfect diagonal every time. It really is that simple. Sometimes, if you listen very closely, you can even hear the angels singing.
As an added bonus, the plastic creates a smooth surface on the machine that seems to prevent some of the balling up and entanglement issues. Why? My theory is that it keeps the fabric moving smoothly, and therefore it doesn't have time to get tangled, even on those pointy little edges. But what do I know? I'm no scientist. All I can tell you is it seems to make a difference.
In the pattern and on the cover, the background pieces are all different low volume fabrics rather than one fabric for all of the background. I personally think that though it is more of a pain to cut all those pieces, the end result of the block is SO much more interesting with all those different fabrics, and it's really what gives the block the "vintage-y" look that lent it its name. But all that is really neither here nor there at this point since you have already done all your cutting. My point in bringing it up at all is that if you are using all different fabrics in the background, there's so much going on in this quilt that no one will notice if one or two of the same one touch, so put them on without spending a whole lot of time overthinking.
Okay, so moving on...you've gotten all your little background squares sewn to your prints, which as you will see on page 3 we now call Unit A. Whether you do this in sets of 16 prints, so you do enough for one block at a time, or you do all the print squares for your entire quilt at once, is totally up to you. I like to do one block worth at a time to break it up. Either way, at this point, grab 16 of your Unit As. Admire how awesome they are.
Now, maybe you care and maybe you don't about this next process, which is to plan a little bit about where to place the fabrics within each block. I cared in the quilt I am currently making but I didn't in the cover quilt, and the reason was that in this current quilt my fabrics tend to be a little more similar, and I didn't want prints that look too much the same too close to each other in the block. Also, to be honest, I didn't make any of the cover quilt blocks, so I REALLY had no need to care about those. So here's how I rectified that. If your prints are more scrappy, you can probably just piece the blocks without worrying too much about placement.
1. Choose four fabrics for your corners, Units B and C on page 3. I choose two sets of fabrics that are quite similar to each other - a set of teal with yellow, and a set of teal with white

NOTE: Did you read step 2 on page 3? That reminder to watch placement of corner triangles is worth tattooing to your hand. Or embroidering to hang above your machine. Or something. Without doing it right, your block will not look like mine and you will be sad. I don't want you sad.

3. For the rest of the block units, you will need four Unit As for the center, which I like to choose kind of the same way as for the corners, that is two sets of similar prints, and then the rest in pairs for the sides. This is a little different from the order I have in the pattern on pages 3 and 4. What did I say, I'm a rebel.


Finally, another thing to consider, something I did when making my blocks, is changing up the construction of Unit E in some of your blocks. I am making the baby size quilt, and decided to do four Unit Es as shown on page 4, but then mix it up and do five with the larger triangles to the middle. Look how Unit E goes from roundy to squarey with just that simple change! But the block still looks cool, and the "starry" sort of center created with the background fabrics remains.

Remember to post your progress on the Vinnie Loves Maude QAL group. I love seeing what you are all doing!

1 comment:
I also find that using the straight-stitch throat plate on my Pfaff makes a WORLD of difference in it not eating all my corners. That, with the angler, are the best tricks I've ever found!
Post a Comment